ONE: For a second seam in the lower cup, mark a line going from your bust point down to the bottom seam line.
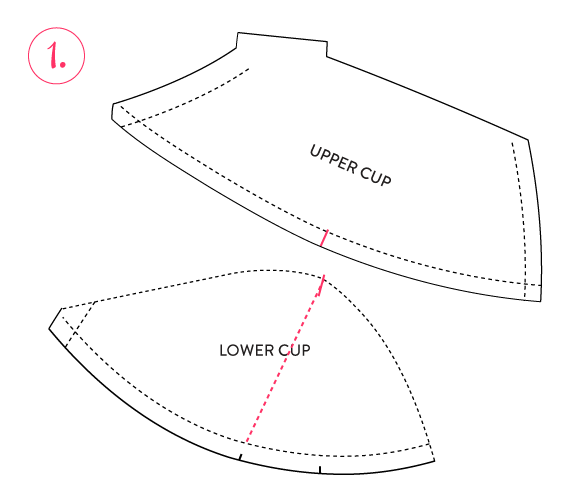
It doesn’t matter where the line ends at the bottom so feel free to experiment! In this example, I’m dividing the lower cup into two relatively equal pieces, which will result in a seam that runs perpendicular to the main seam.
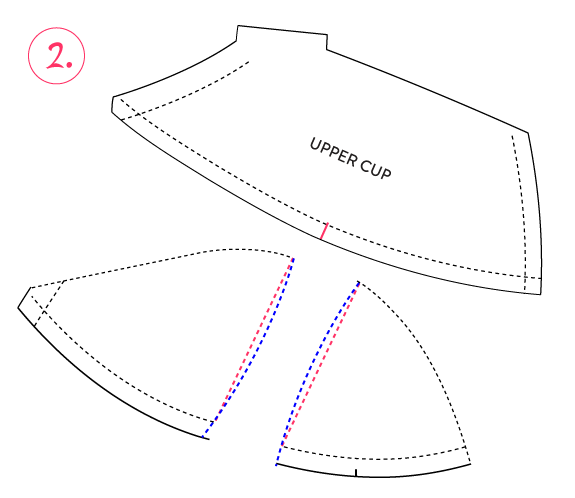
TWO: Cut the pattern piece along the lines and trace your two new pieces. Draw in a smooth, even curve connecting the top and bottom seamlines. The curve should be fairly subtle.
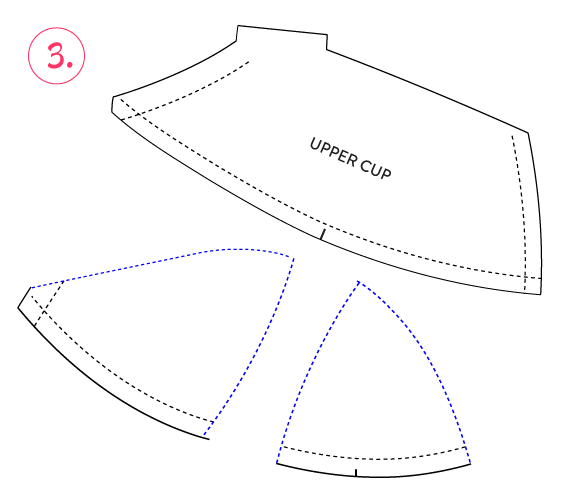
THREE: That’s it–your new pieces! Don’t forget to walk the seamlines and add 1/4″ allowances to the new seam.
VERTICAL SEAM ALTERATION
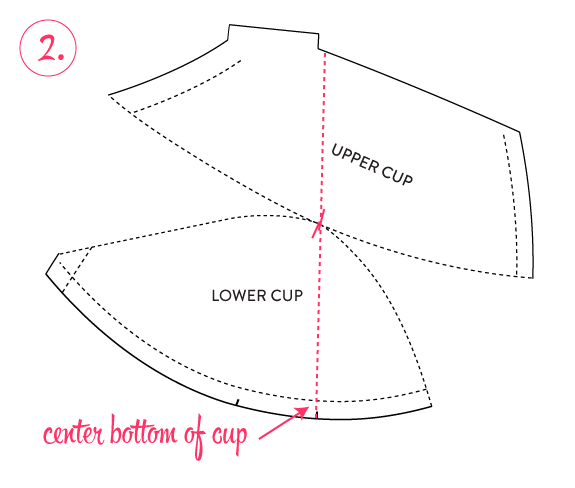
For this alteration, first mark where you want your seam to start and end. A vertical seam doesn’t have to be straight up and down–you could slant inwards or outwards. I found my starting points by marking these positions on a previous bra. It just so happens that my pattern–Pin-up Girls Classic–has a notch right at the center bottom, which is usually where a straight vertical seam starts.
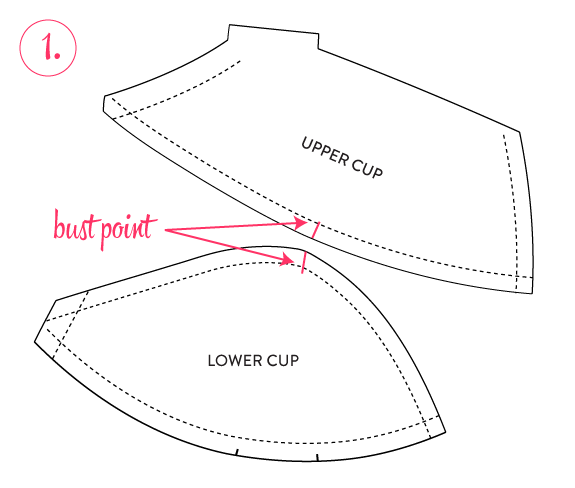
ONE: Mark the bust point of your pattern.
TWO: On both pieces, mark in lines on the top and bottom cups, going from the desired starting point of your new seam to the bust point. I rotated the bottom cup in this example so I could draw a straight line down the two.
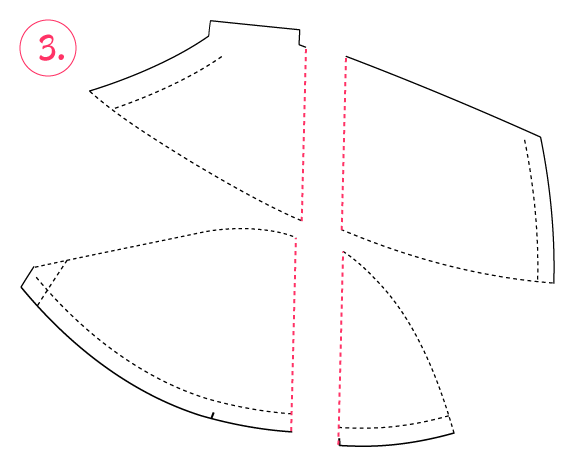
THREE: Split these pieces apart on the lines. You should now have four pieces total.
FOUR: Line up the top and bottom pieces along the sides until the seamline along the sides of the cup form smooth curves.
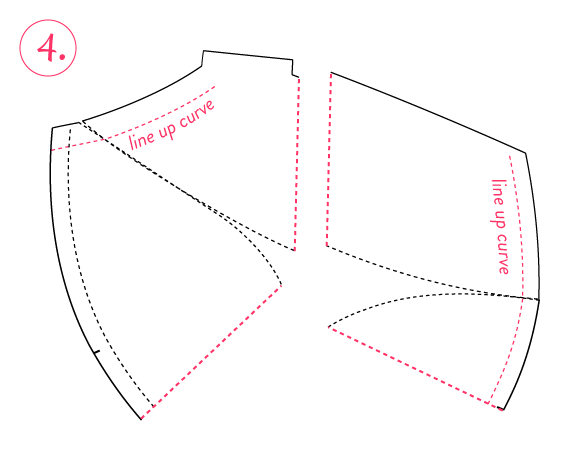
The cross-cup seamlines will match each other for a short distance, but will not come together at the bust point. Trace off the these new inner and outer pieces.
FIVE: Depending on your pattern style and where the apex is, one side may have smaller “dart” than the other. In this case, the outer cup has the smaller dart, so draw your new seam line on this side first. Draw in a smooth curve connecting the two upper and lower pieces close to the bust point.
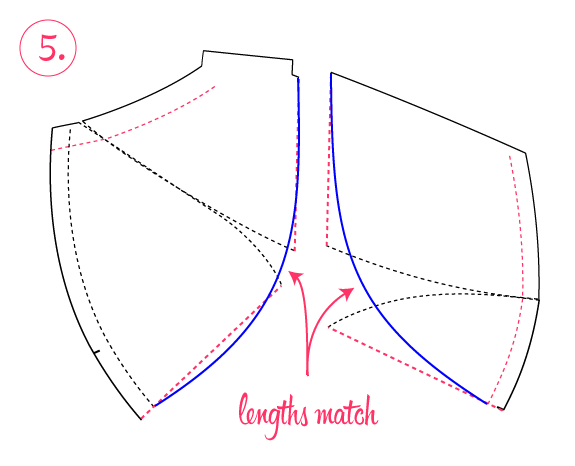
On the inner cup, draw another curve of equal length. Because the “dart” on this side is so wide, the curve will not go around the apex. (You need to take some out from that “dart”, if that makes sense!) You can use a measuring tape to find the right curve length.
ETA: The flatter these curves, the less length (and volume) the cup will have. In your fitting, experiment with them to find the shape you like. If you’d like to pull things in more, you can experiment with making the inner curve slightly flatter than the outer curve–a good tool to use in shaping!
SIX: Smooth out all the new seam lines, mark your bust point notch, and add seam allowances.

In the above illustration I’m also smoothing off that strap extension from my pattern, because I’m not going to use a fabric strap.
There ya go–a totally new cup!
—
I hope these are clear, so let me know if you have any questions!
Have a beautiful weekend, all. And get ready to start the engines–on Monday we’ll finally get to sewing and I’ll start with some cutting and layout tips. See you then!
sbans.............


